


Want to turn your Figma designs into a stunning WordPress website? You’re on the right page!
Figma and WordPress are both powerful platforms for building professional websites, from simple blogs to complex e-commerce stores. Depending on your experience, you can choose to either build your site from scratch with HTML codes or use a Figma plugin to move your design to WordPress.
In this article, we’ll discuss these two different methods and see which one works best for you.
Option 1: Code the Design from Scratch
Coding a design from scratch is, by far, the most accurate way of converting your Figma design to WordPress.
But here’s the downside - this approach requires a lot of development time and coding skills. If you have tight deadlines or limited coding experience, it might not be the most practical option.
Here’s how it’s usually done:
1) Export the Assets from Figma
Assets are the building blocks of your design. They can range from simple icons to complex illustrations. In Figma, these are typically vector graphics or bitmap images.
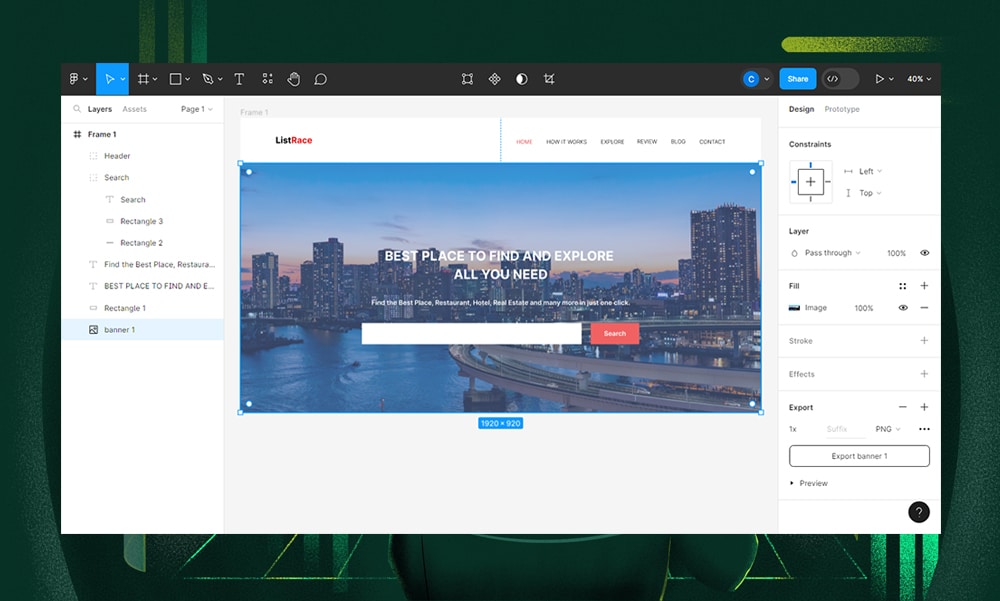
Open your design on Figma and click on the element you want to export. You can also select multiple elements at once by holding down the ‘Shift’ key on your keyboard.
Note that, for this tutorial, we’ve recreated a free template from Free CSS.
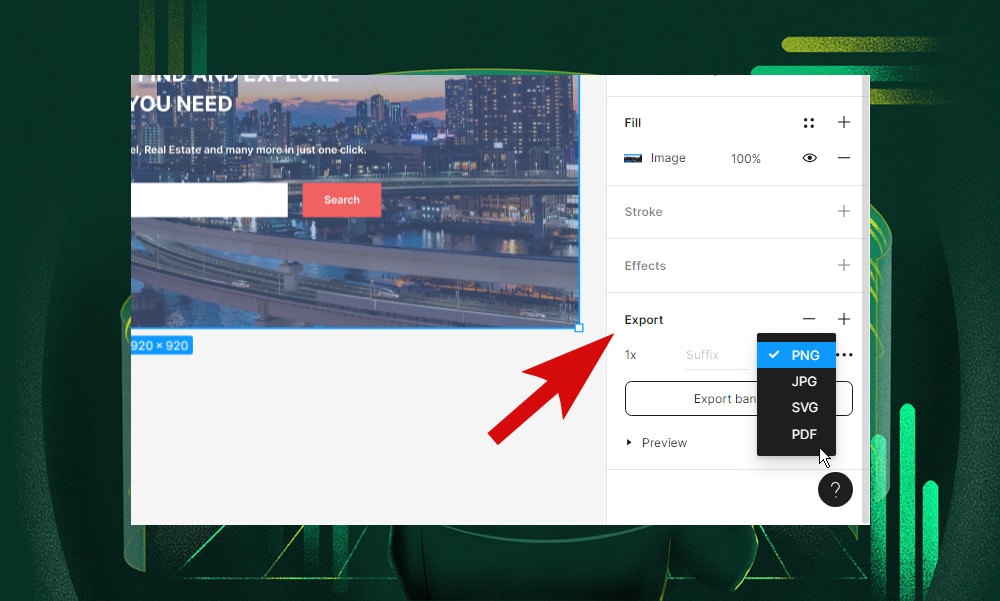
Now, click ‘Export’ on the right panel and choose the correct format for your assets. For images, you can use formats like PNG or JPG. However, PNG is preferable for designs with transparency. For icons and vectors, SVG format is ideal as it maintains quality at any scale and offers smaller file sizes.
You’ll also need to select the appropriate resolution for your assets. Typically, 1x or 2x should be good enough for web use.
Then, name your files. Note that Figma allows you to add suffixes to file names based on resolution (e.g., ‘@2x’ for high-resolution files).
Finally, click 'Export [Asset Name]'.
Remember, the quality and format of your exported assets directly impact your website's appearance and performance. Make sure that all your assets are correctly exported.
2) Create a WordPress Theme
A WordPress theme is a collection of files that controls the appearance and functionalities of your site. These could include PHP code, CSS stylesheets, and JavaScript files.
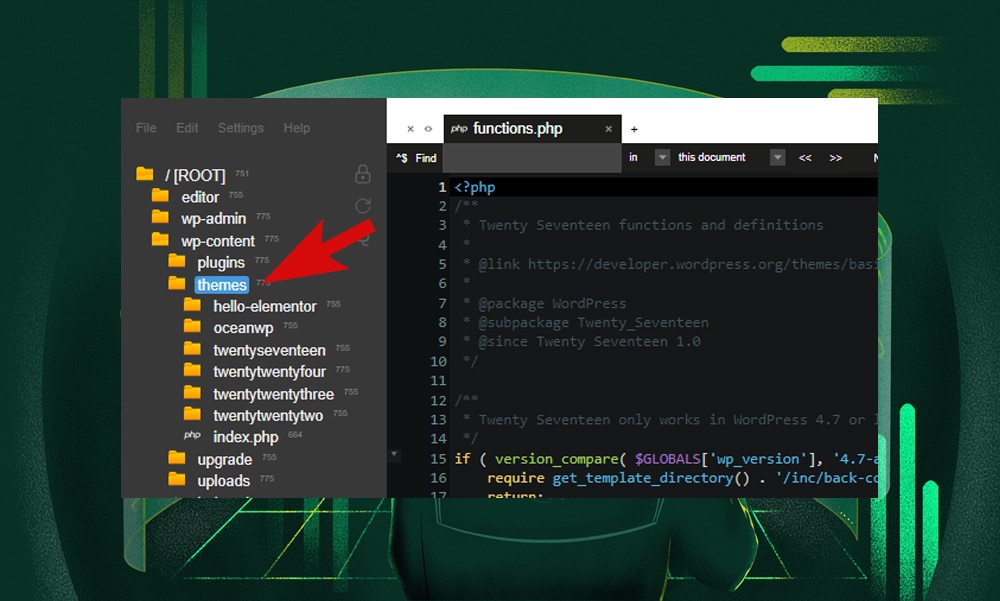
To convert your Figma design, you’ll need to create a custom WordPress theme. Start by creating a new folder in the /wp-content/themes/ directory of your WordPress installation. Name this folder after your theme.
Note: There are many ways to access your theme files on WordPress. You might want to check out our separate tutorial How to Install a Theme on WordPress to learn more.
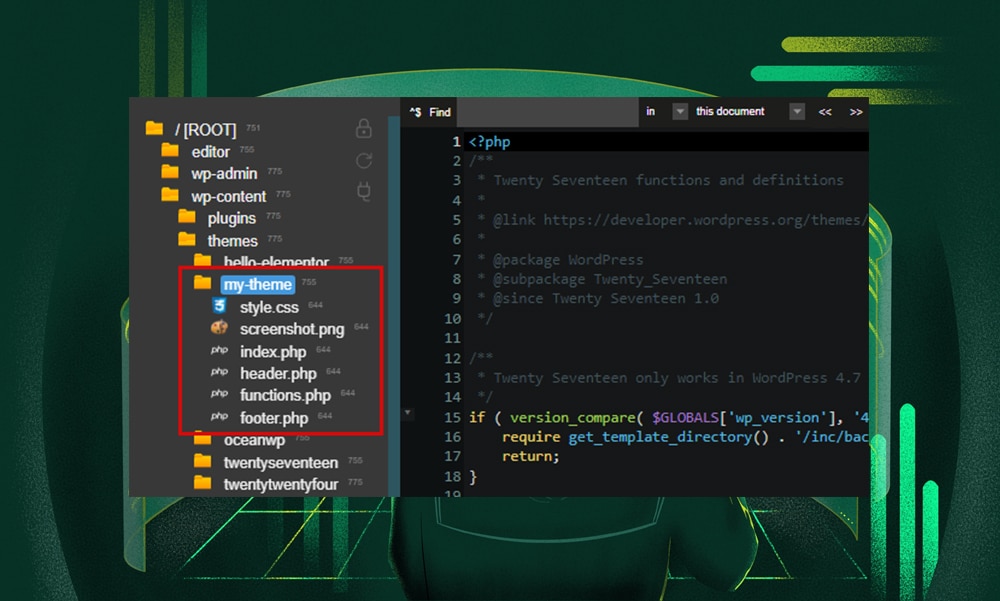
Now, add these basic files inside your theme folder:
- index.php: This is the main PHP file of your website. It is often used as the homepage or the central file that loads your site’s content.
- header.php: This PHP file typically contains the HTML code of the header section, including navigation menus and site branding.
- footer.php: This is where the HTML code of your site’s footer section is added, including copyright information and links.
- functions.php: This PHP file contains the functions that add features or modify the behavior of your website.
As a developer, you’re free to customize and add more template files to your theme folder, depending on your needs. WordPress will then display the page based on this template hierarchy. For now, you can leave these files blank and add the codes later.
Next, set up your theme’s CSS stylesheet. In the same folder, create a new file and name it ‘style.css.’ This is where you’ll add styles for fonts, colors, margins, borders, and other visual aspects of your website.
Start your 'style.css' file with a header comment that includes the theme name, author name, description, version, and other details. Doing so will help WordPress recognize your theme, like in the example below:
/*

Theme Name: My WordPress Theme
Author: Christy
Description: This code converts Figma design to WordPress.
Version: 1.0
License: GNU General Public License v2 or later
License URI: http://www.gnu.org/licenses/gpl-2.0.html

*/
Don’t forget to add an image to visually represent your new theme on the WordPress theme directory. The size of the image can vary, but we highly recommend a size of 800x600 pixels. It should be in PNG format. Name the image ‘screenshot.png’ and add it to the theme folder.
Your theme folder should now look like this.
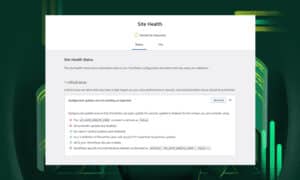
Now, open your WordPress admin dashboard and go to Appearance > Themes. Your custom theme should now be displayed here. Click on it to activate it.
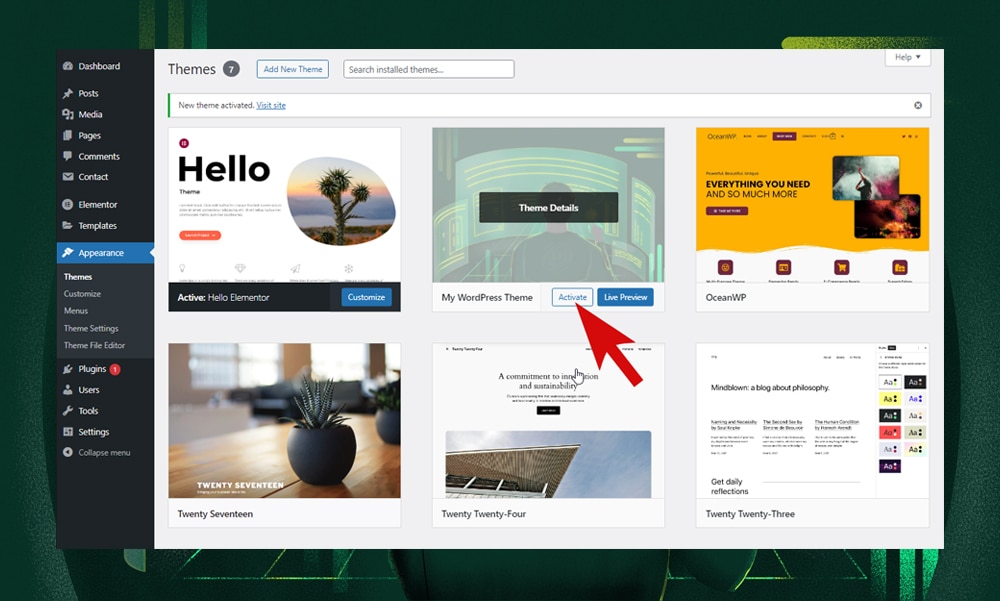
Right now, your homepage will be blank because we haven’t added any code yet, which we’ll do in the next steps.
3) Create an Assets Folder
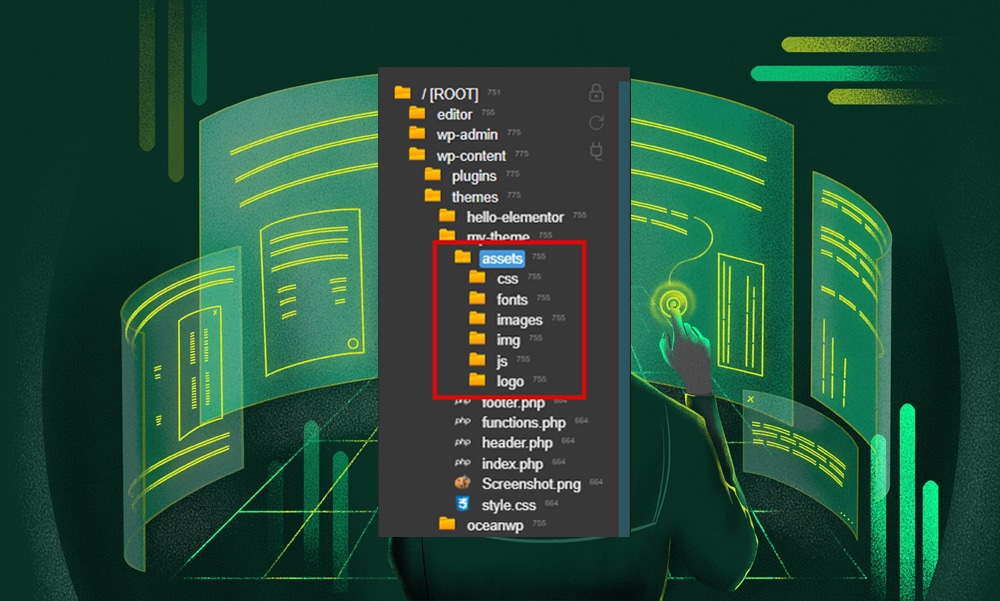
Within your theme folder, create a new folder and name it ‘Assets.’ Copy all your exported assets from Figma here.
Tip: If you have a complex design, it’s generally a good practice to organize your assets into different subfolders, like the one shown below.
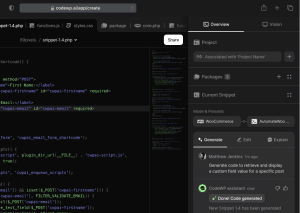
4) Add HTML, CSS, and JavaScript to Theme Files
With your WordPress theme set up, you can now translate your Figma mockups into codes. You’ll need a code editor for this part.
Start by setting up your HTML structure with elements like headers, footers, navigation bars, and sections. Typically, this is where you’re going to fill in the PHP files (index.php, header.php, and footer.php) with codes.
Next, use CSS to style your HTML elements. In the 'style.css' file, set your colors, fonts, sizes, and other design aspects. For better styling, you can use any of these:
- CSS preprocessors like SASS or LESS
- Frameworks such as Bootstrap or Tailwind
- A WordPress starter theme
Note that, for complex designs, you don’t need to put all your CSS codes in one file. Some developers keep the main 'style.css' file empty (except for the header comment) and add separate CSS files for different parts within the assets folder. This makes it easier to handle and update your theme's styling, rather than sorting through a huge single CSS file.
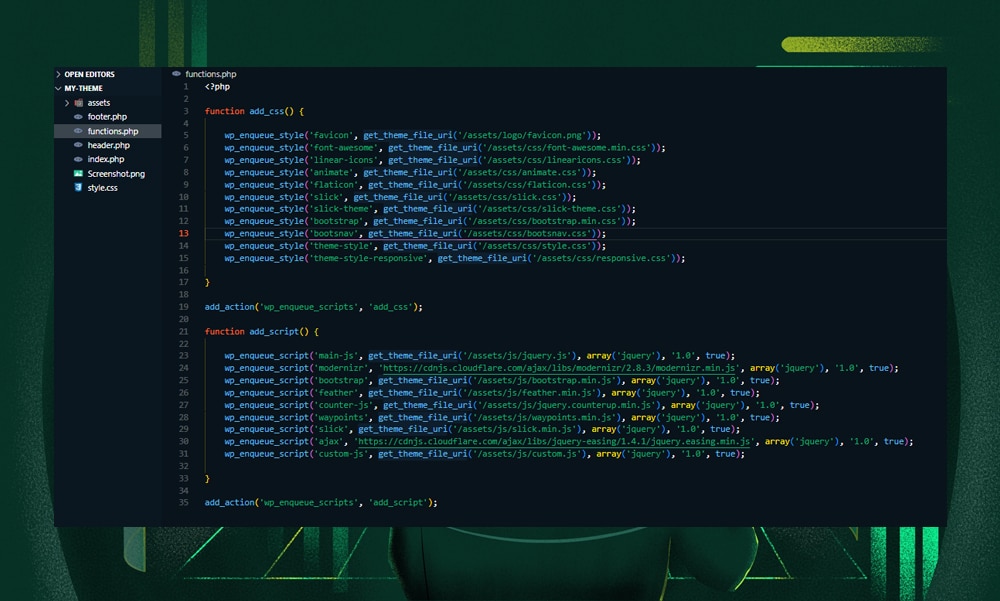
Finally, for adding JavaScript, identify which design elements need to be interactive, like dropdown menus, sliders, or form validations. Consider using jQuery to simplify complex tasks, such as AJAX calls and DOM manipulation, to make your development process smoother and more efficient.
All of your styling sheets and scripts must be enqueued to the ‘functions.php’ file.
As you might notice, the steps above require a keen eye for details and a good understanding of web development. If you’re not an experienced developer, we highly recommend using a Figma plugin to make things a little bit easier. We’ll talk more about this in the next section.
Also, take a look at our other tutorial, How to Convert HTML to WordPress, if you wish to know more about building a custom WordPress theme.
5) Test and Optimize
Now, save your work and check the functionality, performance, compatibility, and overall user experience of your site. Go through your website thoroughly, review every page and feature. Make necessary adjustments based on your testing.
A few tips to keep in mind:
- Make sure your website looks and functions consistently on different browsers like Chrome, Firefox, Safari, and Edge.
- Use browser developer tools to check and view your website on different screen sizes.
- Use tools like ShortPixel and Imagify to optimize your assets.
- Implement caching to speed up your website. This can be done using WordPress caching plugins like LiteSpeed, WP Rocket, and WP Super Cache.
- Before going live, make sure you have a full backup of your site.
Option 2: Use a Figma Plugin
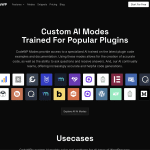
The great thing about using a Figma plugin is that it streamlines the process of converting designs into code. It’s targeted towards beginners and designers with little to no experience in coding. Even advanced developers might also benefit from using this app to speed up the development process.
There are many Figma plugins out there, each with its own special features. For our purposes, we're going to use UiChemy to show you how to turn Figma designs into a WordPress theme.
Converting Figma to WordPress Using UiChemy
UiChemy is pretty straightforward to use.
First, you’ll need to sign up for an account. You can choose either a free plan with no credit card required, or a paid plan to unlock more features.
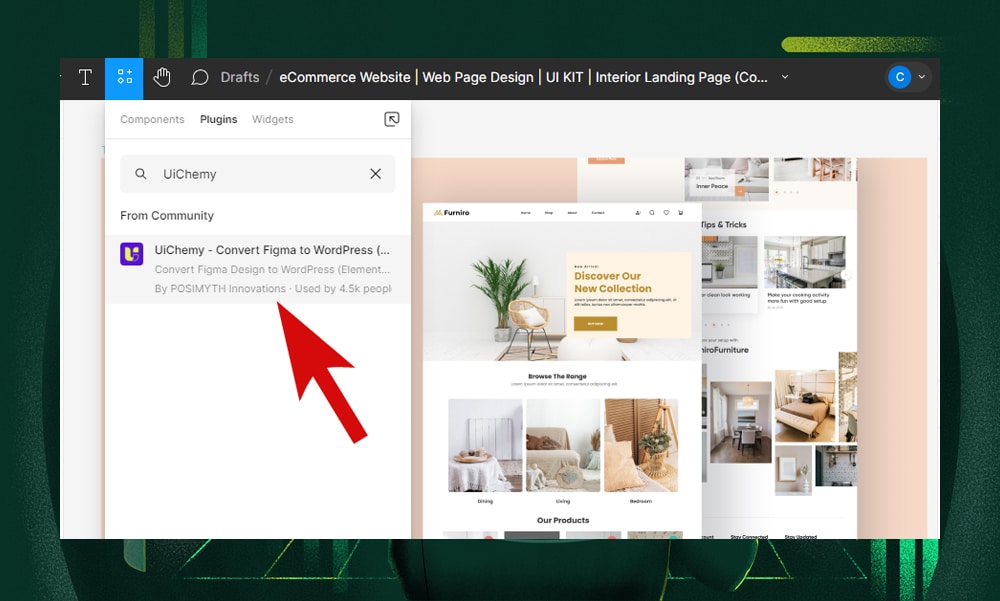
Now, open your design on Figma. Install the UiChemy plugin from the dashboard to begin the conversion process.
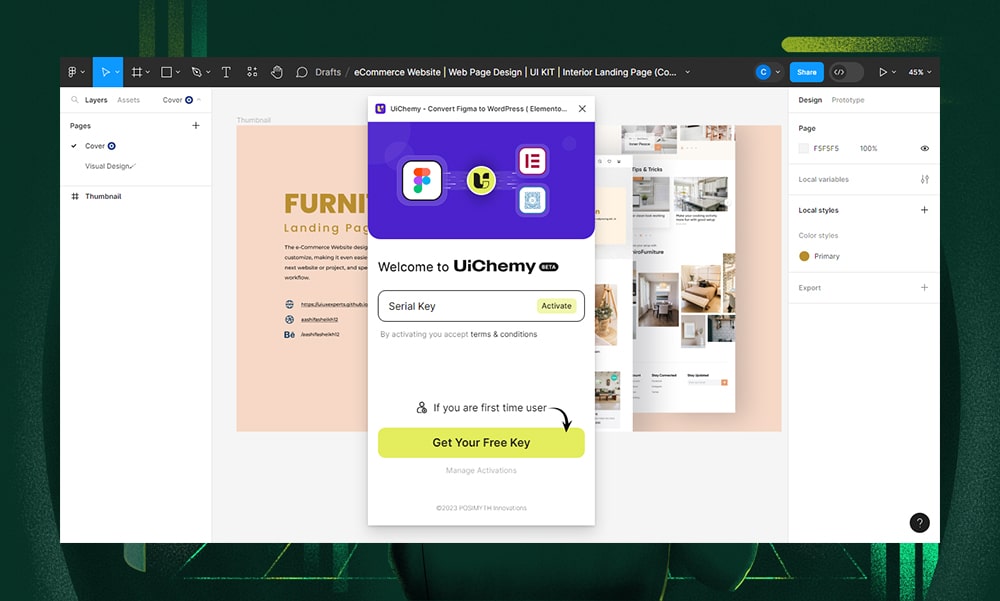
Once you run the plugin, you’ll be prompted to click the ‘Let’s Start’ button to set up your account. You’ll also be asked to enter your UiChemy serial key. This can be found on your POSIMYTH account dashboard.
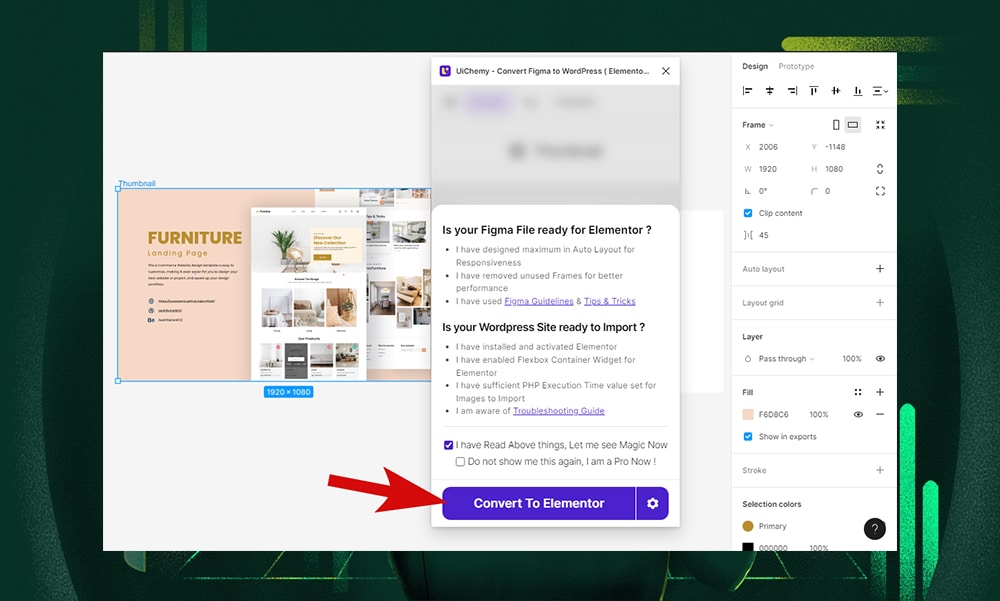
Once activated, select a frame you want to convert. Then, click ‘Convert to Elementor’ in the pop-up window. Currently, UiChemy supports conversion to Elementor, with future plans to include Bricks and Gutenberg.
Make sure that you have read all the conditions before converting your Figma design to Elementor. This includes having Elementor installed and activated on your WordPress website.
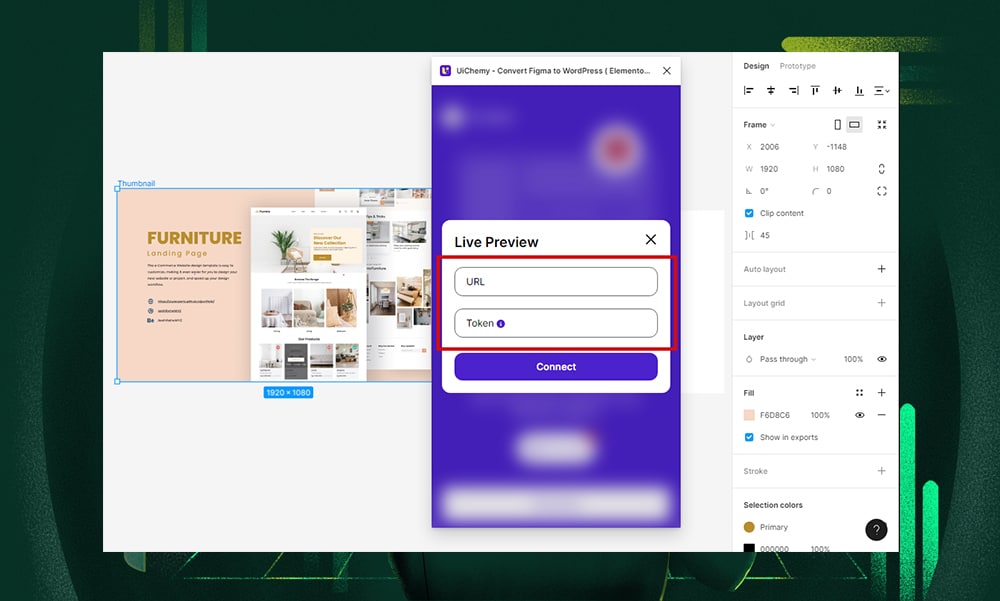
Note that you can also preview your design by entering your site’s URL and token key. You may check out UiChemy’s tutorial, What is Live Preview, to learn how to generate your token key and website URL.
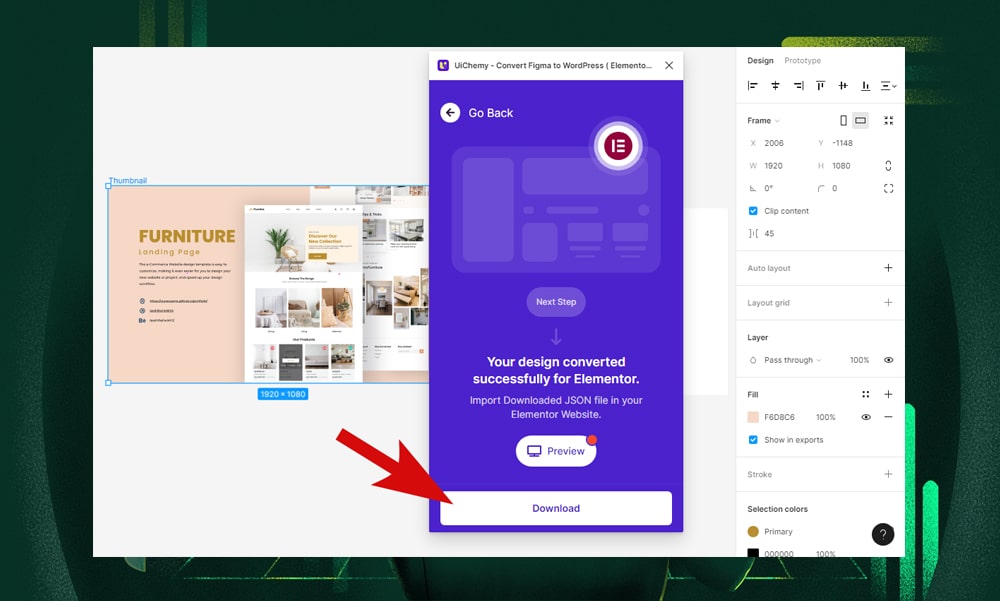
If you don’t wish to preview your page, you can directly click on the ‘Convert to Elementor’ button. Doing so will instantly convert your design and download it as a JSON file.
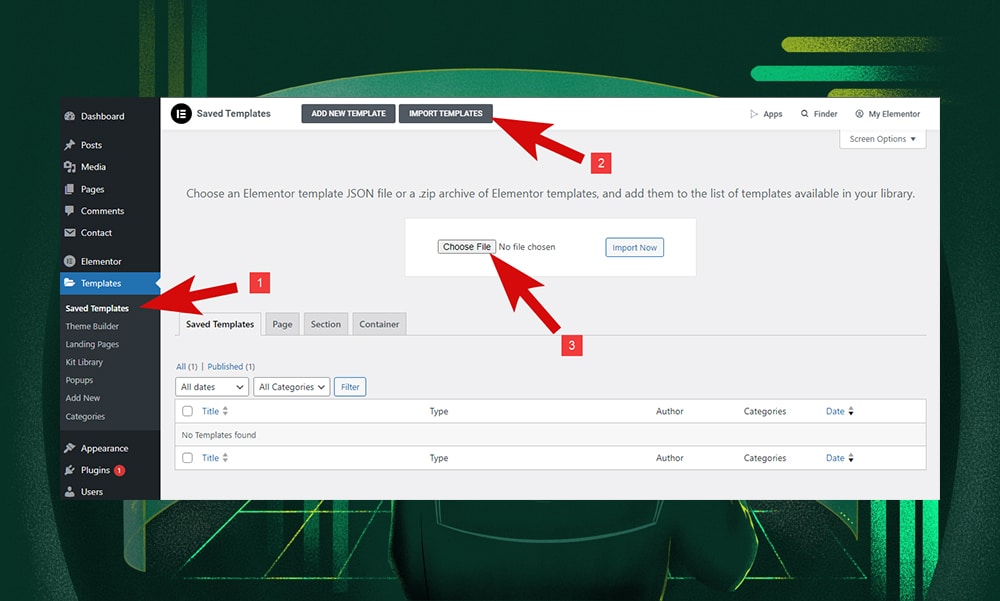
Now, open your WordPress admin dashboard and go to Templates > Saved Templates. At the top of the page, click on the 'Import Templates' button to upload the JSON file.
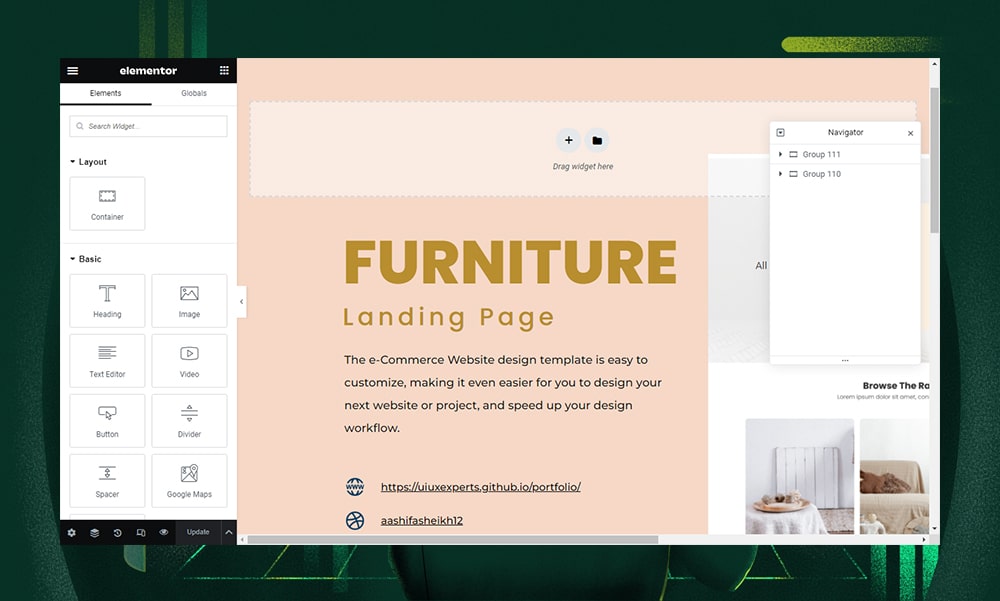
You should now see your design uploaded in the ‘Saved Templates’ section. Open it in the Elementor editor if you wish to make further edits.
Once you're happy with the changes, time to view it on the front end. Check that the images are loading properly, the buttons work as intended, and the design looks great across different devices.
Other Figma Plugins to Try
Looking for more options? We’ve listed below some good alternatives based on their ease of use, code quality, and positive reviews:
1) Anima
Anima offers two ways to convert prototypes into HTML: directly from the Figma plugin or using Anima’s web app. Whichever method you use, you’ll find this app a convenient tool for converting your designs to code.
When using the Figma plugin, you can select specific components of your design to export, which is great for large projects where you might not need the entire design converted at once. The exported code package includes HTML, CSS, images, and font files.
One disadvantage we see with Anima is that the level of customization and control over the code might not be as granular as manually coding the site. Additionally, after converting your design to HTML, you'll still have to either build the codes by hand or use a different plugin to get them onto WordPress.
You can check out this tutorial on how to export Figma designs to HTML with Anima to learn more.
2) Yotako
Yotako lets you convert designs from both Figma and Adobe XD to WordPress. This flexibility is great for different types of projects since you're not limited to just one design tool.
Unlike Anima, Yotako allows you to import your converted files directly to WordPress. It even lets you set custom screen resolutions, so your websites look great on any device. This feature guarantees that your final website maintains visual integrity and responsiveness, no matter what screen size you use.
But just like the other apps, Yotako has a learning curve. Also, the code it creates might sometimes need a bit more tweaking. Regardless, we still find it one of the easiest apps to use for streamlining your design-to-WordPress workflow.
Here’s a quick guide on translating Figma to WordPress using Yotako.
3) Fignel
Are you an Elementor fan? Then you might want to consider Fignel.
The key feature of Fignel is its ability to convert Figma designs into Elementor modules such as sections, columns, headings, videos, and images. This saves a lot of time, allowing designers and developers to focus more on refining the details of their websites, instead of building everything from the ground up.
Fignel supports various widgets, too, and plans to add even more, along with some pre-made templates.
But, like the other apps, it's got a few limits. Right now, it's better for simpler websites because its modules are limited. Also, it doesn’t support image compression, doesn't have its own WordPress plugin, and doesn't offer as many ready-to-use templates as UiChemy does.
If you’re curious about how to use Fignel with WordPress, you may visit this link.
FAQs
Can Figma designs be used for WordPress?
Yes, you can use Figma designs for WordPress. They can be converted into WordPress themes either manually by coding or using apps like UiChemy, Anima, Yotako, and Fignel, as mentioned in this article.
How do I convert Figma to WordPress Elementor?
To convert Figma to Elementor, we highly recommend using apps like Fignel or UiChemy. Before converting, make sure that your design is complete and export-ready.
Is it possible to convert Figma to HTML?
Yes, and the easiest way is to use a Figma plugin. For non-WordPress projects, we highly recommend apps like Anima, which efficiently exports Figma designs into clean HTML codes.
Wrapping It Up
Moving your design from Figma to WordPress might not always be that easy, especially if your site is packed with intricate details and features.
In this guide, we’ve shown you different ways to do it.
Coding by hand gives you more control but takes more time and WordPress know-how. Plugins are quicker and easier, though they might need a bit of tweaking to get perfect results.
Whether you go for the detail of manual coding or the ease of plugins, it's up to you. The key is to pick what works best for your project and skills.